In this guide
Expected result
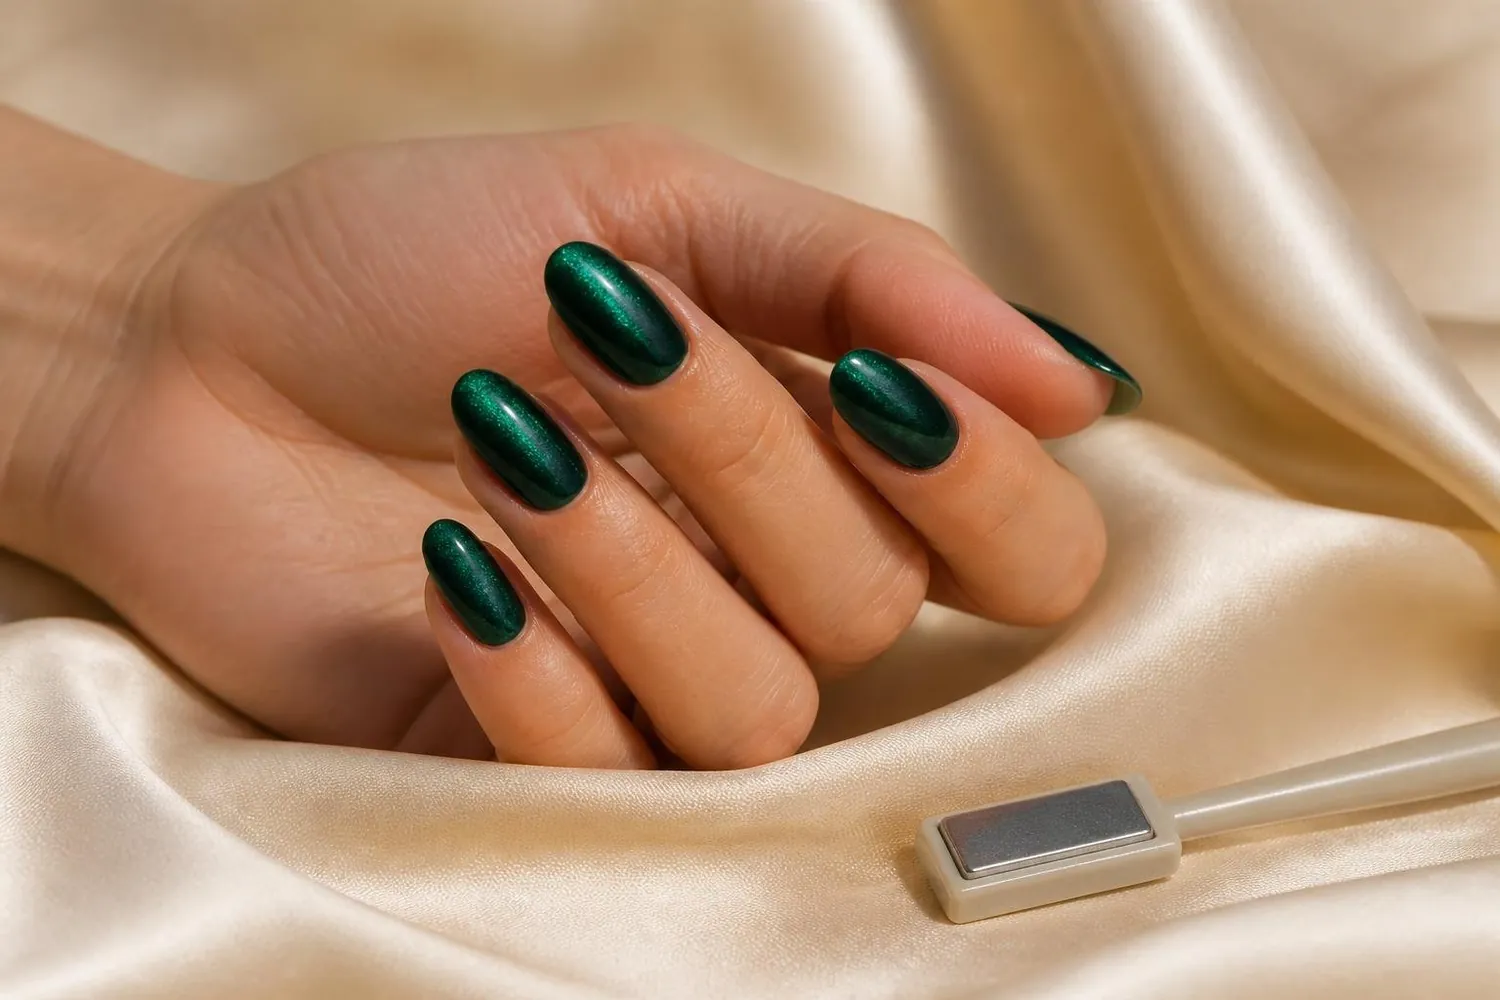
Velvet nails have a soft, diffused shimmer that seems to sit deep inside the color and moves as you turn your hand. They're made with the same magnetic gel used for cat-eye nails. The gel contains fine magnetic particles; holding a magnet near the wet polish pulls those particles into position before you cure it. A cat-eye design gathers them into one sharp line, while the velvet technique spreads them across the whole nail so the light looks plush, like crushed velvet fabric.
There's nothing fuzzy on the nail itself. The finish can be glossy for a jewel-like look or matte if you want it to look even more like fabric. Deep greens, burgundies and blacks are popular in winter, and you'll see plenty of them in our Christmas nails and New Year's nails ideas, but neutrals and champagne shades work just as well.
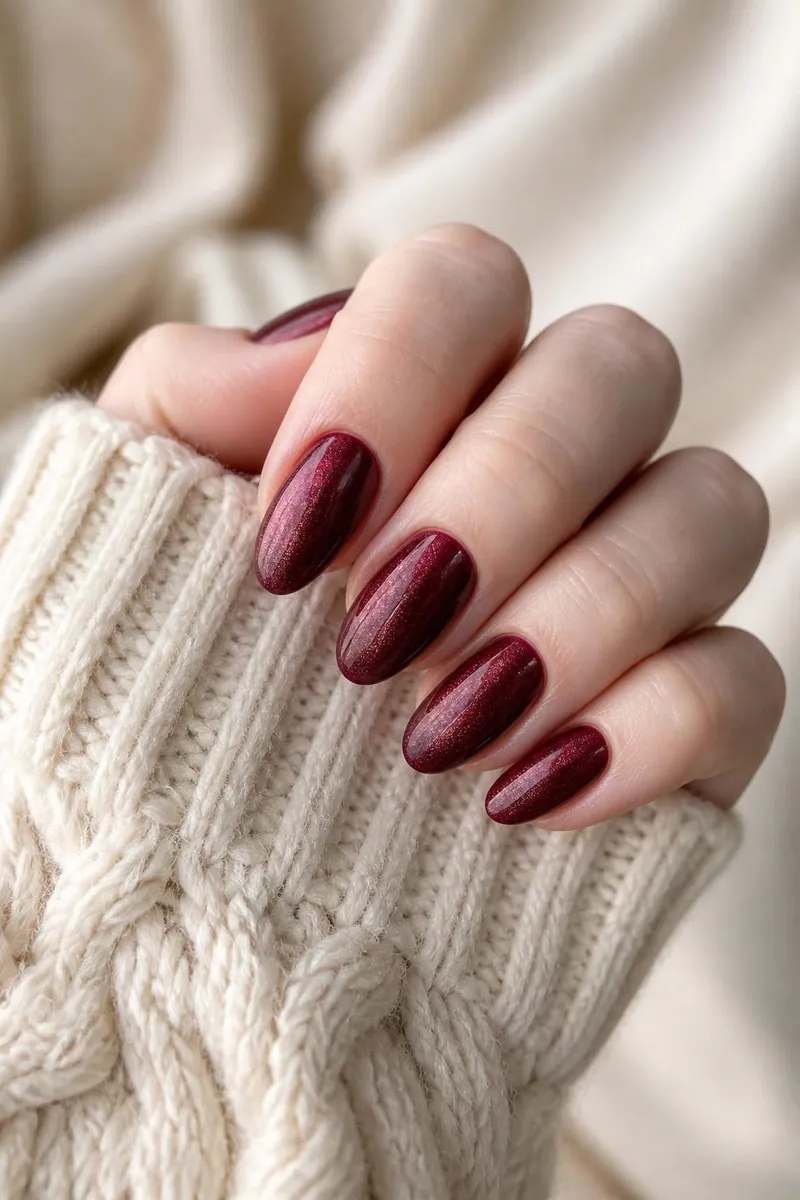
Because this is a gel manicure, expect it to last around two to three weeks with good prep. It's rated medium difficulty: none of the steps are hard, but you need to work one nail at a time and move fairly quickly. If you've never used gel before, practice on one or two nails first, or on a plastic nail tip, until the timing with the magnet feels natural.
What you'll need
- Nail file and buffer
- Cuticle pusher or orangewood stick
- Lint-free wipes and rubbing alcohol or a nail cleanser
- Gel base coat
- Optional: a black or dark gel color as an under-layer (check your magnetic gel's instructions)
- Magnetic (cat-eye) gel polish in your chosen shade
- A nail magnet; a strong bar magnet or a velvet-style magnet with a wide or multi-sided end works best
- No-wipe gel top coat (glossy or matte)
- An LED or LED/UV nail lamp that matches your gel products
- A small brush or wooden stick for cleanup
- Cuticle oil
Safety first: Gel products are designed to be cured under a lamp, and cure times differ from brand to brand. Always follow the instructions that come with your gel and your lamp. Keep uncured gel off your skin, because repeated skin contact can lead to irritation or allergic reactions. If gel gets on your skin, wipe it off before curing. Work in a well-ventilated space, and if you notice redness, itching or swelling around the nails, stop using the products and speak with a doctor or dermatologist.
Step-by-step
1. Prep your nails
Remove any old polish, then file your nails to shape. Gently push back the cuticles. Lightly buff the shine off the surface of each nail; you only need to remove the gloss, not thin the nail. Wipe each nail with alcohol or a nail cleanser so there are no oils or dust left. Careful prep does more than anything else to keep gel from lifting.
2. Apply and cure the base coat
Brush on a thin layer of gel base coat, keeping it away from the cuticle and sidewalls. Cap the free edge. Cure under your lamp for the time listed on the product.
3. Add a dark under-layer (optional)
Many magnetic gels are fairly sheer, and a black or dark color underneath makes the shimmer look deeper and more dramatic. Some formulas are designed to be worn on their own, so check the instructions. If you use an under-layer, apply one or two thin coats and cure each one.

4. Shake the magnetic gel well
The magnetic particles settle at the bottom of the bottle, so shake or roll it well for a minute or so before you open it. Some bottles include a small mixing ball. If the shimmer looks weak, the particles probably need more mixing.
5. Paint one nail and use the magnet
Apply a thin, even coat of magnetic gel to one nail only. Right away, hold the magnet close to the nail without touching the wet gel. For a velvet look, move the magnet slowly in small circles or sweep it from side to side across the nail for a few seconds. Moving the magnet spreads the particles evenly over the nail; a still magnet pulls them into one line. Some velvet-style magnets have wide ends designed to do the spreading for you.
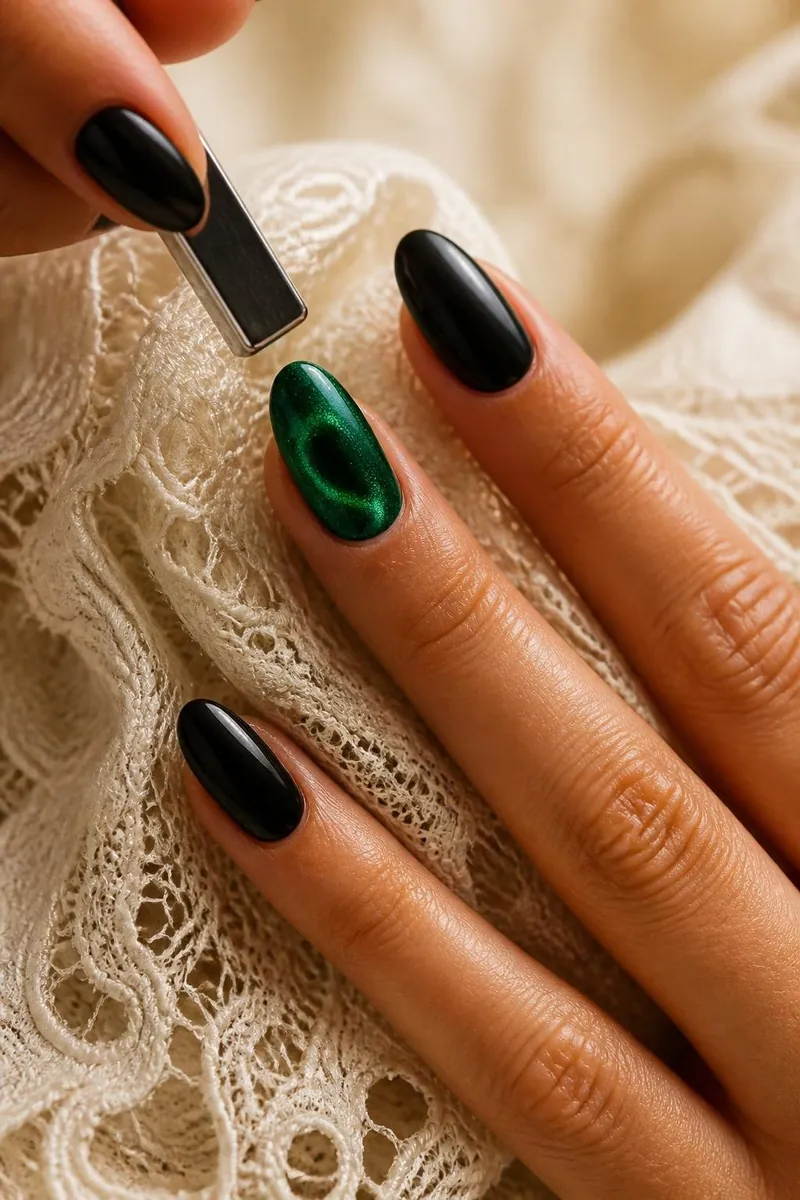
Work quickly. The particles only move while the gel is wet, and the effect slowly relaxes the longer you wait.
6. Cure that nail right away
As soon as you like the effect, cure the nail. Some people do a short initial cure to lock in the pattern, then a full cure afterward; follow your gel's instructions on timing. Then move to the next nail. Painting and magnetizing one nail at a time keeps the magnet from disturbing wet gel on other fingers.
7. Build a second coat
For a richer, more even shimmer, repeat the process with a second thin coat: paint, use the magnet, cure. Two coats usually give more depth than one thick layer.
8. Seal with top coat
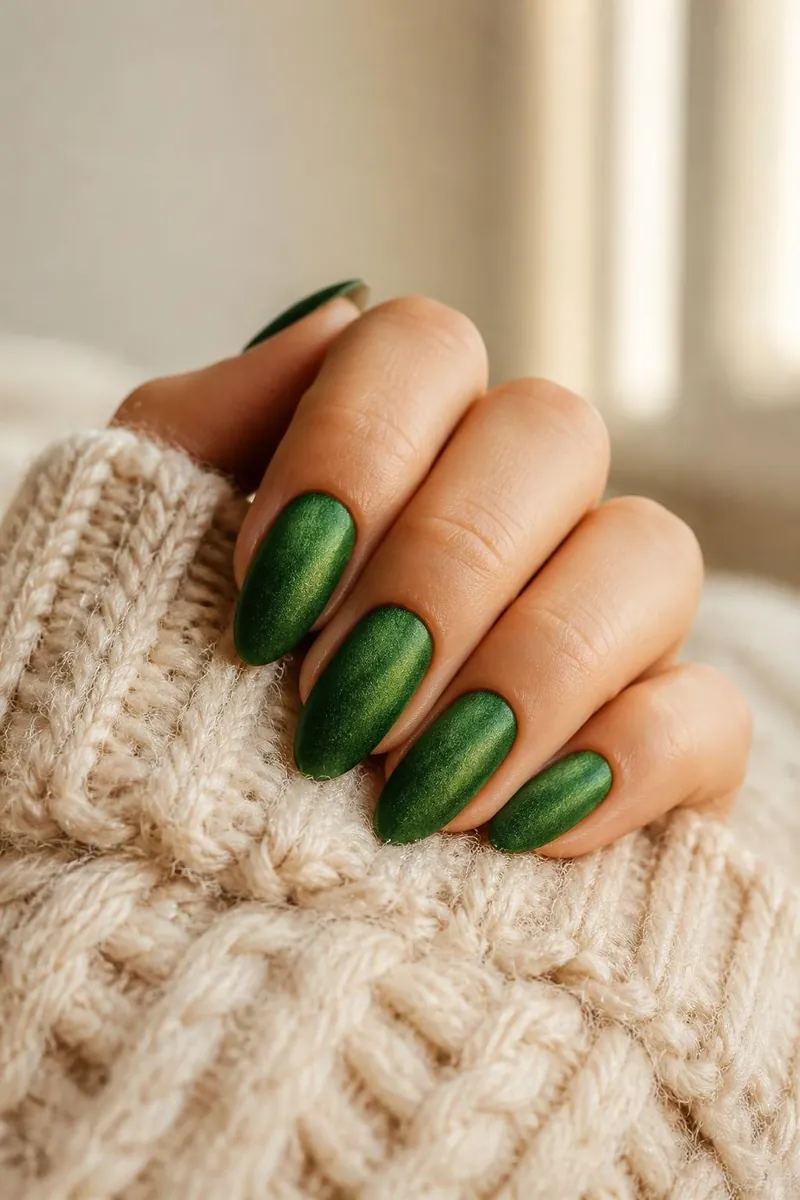
Apply a no-wipe gel top coat and cure. A glossy top coat gives a jewel-like finish; a matte top coat makes the velvet look even more fabric-like. If your top coat isn't no-wipe, remove the sticky layer with alcohol after curing, as the product directs.
9. Finish with cuticle oil
Once everything is cured, massage cuticle oil around each nail. It hydrates the skin, and the manicure looks more finished with it.
A note on regular magnetic polish
Magnetic nail polish also comes in regular lacquer formulas that don't need a lamp. The idea is the same, but lacquer dries quickly, so you have only a few seconds after painting to use the magnet. The effect is usually softer, and it won't last as long as gel.
Common mistakes
- Painting all ten nails at once. The particles settle quickly, and a magnet near one nail can disturb wet gel on its neighbors. Work one nail at a time.
- Touching the gel with the magnet. Hold it close, but keep a small gap so you don't drag the gel.
- Holding the magnet still. This creates a cat-eye line instead of a velvet spread. Keep the magnet moving.
- Waiting too long before curing. The shimmer slowly relaxes; cure soon after you're happy with it.
- Thick coats. Thick gel can wrinkle or cure unevenly. Thin coats cure better and show the shimmer more clearly.
- Not shaking the bottle. Settled particles give a weak, patchy effect.
- Gel on the skin. Clean it up before you cure, every time.
Aftercare
Wear gloves for dishwashing and cleaning, and use cuticle oil daily to keep the skin around your nails supple; our guide on how to care for cuticles has more on that. Avoid using your nails as tools to open cans or pick at labels, which can cause lifting.
When it's time to remove the gel, follow the removal method recommended by the product maker. This usually means gently filing off the shine of the top coat, then soaking the nails with acetone-soaked pads wrapped in foil until the gel softens and can be gently pushed off. Never peel or pry gel off, since that can take layers of the natural nail with it. It's also worth giving your nails a short break between gel manicures.
Relevant product options
For this look you'll want magnetic gel polish, a magnet, a compatible lamp and a good gel top coat.
Products worth a look
Maniology
Maniology 5pc Double Ended Dotting Tool and Detail Liner Brush Set
A five-piece set of double-ended nail art tools, each with a dotting tip on one end and a detail liner brush on…
Researched pickProducts worth a look
Seche
Seche Vite Dry Fast Top Coat
A long-running salon and drugstore favorite: a quick-drying, high-gloss clear top coat applied over wet polish. Retailers describe it as chip-resistant and…
Researched pick